一個 Smarty 程式主要來兩個部分來組成:php程式和html(樣版)。html(樣版)放在templates目錄下,Smarty建議用tpl作為樣版的副檔名(不是tpl也可以)。php程式和樣版分開放在不同的目錄,可以方便控管權限,只開放樣版目錄給UI設計師,這樣就不用擔心他們會異動到PHP相關程式。
樣版 first.tpl 內容:
<html>
<head>
<title>Smarty</title>
</head>
<body>
{* Hello again *}
Hello, {name}!
</body>
</html>
說明:
樣版註解:在Smarty中以"{*"和"*}"所包起來的片段,會被Smarty視為註解。
標籤定義符號:在Smarty中以{}包起來。
指定變數:name便是Smarty指定變數的方式,這和PHP是一樣的。
故 {name} 的作用就像PHP中 <?php echo name; ?> 相類似。
程式 first.php 內容:
<?php
// 載入 Smarty 物件類別檔
require('Smarty/Smarty.class.php');
// 建立 Smarty 物件
smarty = new Smarty();
/* 定義 Smarty 的工作路徑
** 一般在開發 Smarty 程式時,有兩個物件屬性一定要指定。
** template_dir 指定存放樣版的路徑。
** complie_dir 指定存放編譯好的樣版的路徑。
** 此兩個路徑必須是實體路徑,這樣才能夠正確的存取它們。
*/
smarty->setTemplateDir('D:/WebServer/wwwroot/demo/templates');
smarty->setCompileDir('D:/WebServer/wwwroot/demo/templates_c');
/* 指定變數
** 整支程式的關鍵點,透過assign函式來指定結果到變數。
** assign函式的第一個變數是樣版的變數名稱,第二個變數是PHP的變數名稱。
** 兩個變數名稱可以不一樣,但為了方便管理,通常會指定成同樣的變數名稱。
*/
smarty->assign('name', 'World');
// 顯示結果,指定讀取樣版
smarty->display('first.tpl');
?>
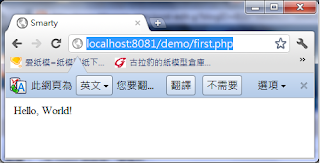
打開瀏覽器,鍵入http://localhost:8081/demo/first.php,假設一切沒問題,會看到下面的畫面:
編譯後的樣版,可以在templates_c目錄底下找到,檔案名稱會是一長串的怪名字,檢視內容:
<?php /* Smarty version Smarty-3.0.8, created on 2011-07-22 16:05:14
compiled from "D:/WebServer/wwwroot/demo/templates\first.tpl" */ ?>
<?php /*%%SmartyHeaderCode:33754e292f3adf9af9-73651535%%*/if(!defined('SMARTY_DIR')) exit('no direct access allowed');
_smarty_tpl->decodeProperties(array (
'file_dependency' =>
array (
'45c799dd90618608878cbe989324a5084622b683' =>
array (
0 => 'D:/WebServer/wwwroot/demo/templates\\first.tpl',
1 => 1311320453,
2 => 'file',
),
),
'nocache_hash' => '33754e292f3adf9af9-73651535',
'function' =>
array (
),
'has_nocache_code' => false,
)); /*/%%SmartyHeaderCode%%*/?>
<html>
<head>
<title>Smarty</title>
</head>
<body>
Hello, <?php echo _smarty_tpl->getVariable('name')->value;?>
!
</body>
</html>
其中 {name} 被替代成 <?php echo _smarty_tpl->getVariable('name')->value;?>
檔案開頭加入了編譯資訊。除非樣版也做任何異動,不然往後 Smarty 就會使用此編譯後的樣版來輸出結果。

